When the measuring station comes to the measuring object
![[Translate to English (International):] Mit dem Einsatz von geeigneten Messvorrichtungen lässt sich das Vorschubgerät auf dem Prüfling fixieren und somit zuverlässige Messergebnisse erhalten. [Translate to English (International):] Mahr-Messvorrichtung für große Bauteile](/fileadmin/_processed_/5/6/csm_Teaserbild_Messplatz-Tisch_unscharf_P1010955_cfcf921c7d.jpg)
Crankcases of emergency power generators, construction machines or ship engines: Large components are often too powerful or too heavy to be tested on stationary roughness measuring stations. And so it is with these components as with the mountain and the prophet: The measuring station comes to the measured object when nothing else succeeds. For this reason, roughness measurements on jumbo components are carried out using mobile measuring equipment. In this process, the mobile roughness measuring device or the mobile drive unit with the built-in roughness probe is positioned by hand on the measuring point to be tested safely, quickly and precisely.
Avoiding incorrect measurements
"Measurements on larger, flat surfaces are relatively easy to accomplish," explains Karl-Josef Gödecke from the Mahr ServiceCenter and responsible for application technology in the surface area. "They require little skill from the operator. However, the repeatability of these measurements varies relatively strongly because the operator can only position on the measuring point by eye." However, for roughness measurements at slanted or vertical locations, as well as for overhead measurements, it is necessary for the operator to hold the drive unit on the surface under test during the measurement to avoid erroneous measurements.
Reliable results through fixing
These problems can be avoided with the use of suitable measuring devices or measuring attachments. They are used to fix the drive unit on the test specimen during the measurement and thus to obtain reliable measurement results. "If the measuring locations are firmly defined in the test specification or in the drawing, the mobile roughness measuring device can be adjusted to the respective measuring position with the aid of a scale or a marker in order to fix it. If only one position is defined in the drawing, a rigid fixture can be used for the drive unit for this feature," explains the measurement expert. The following examples illustrate various measurement solutions on large and complex components:
Example 1: Roughness measurement of valve guides
The manual roughness measuring device, which consists of the MarSurf SD 26 drive unit, the basic assembly and the centering attachment, can be used to measure the roughness of valve guides. The centering attachment serves here as a probe arm guard, with the end stop defining the depth of the measuring location. In this way, the measuring point can be reached quickly and reliably. The measurement is started with the green start button on the device.
Example 2: Roughness measurement in cylinder bores
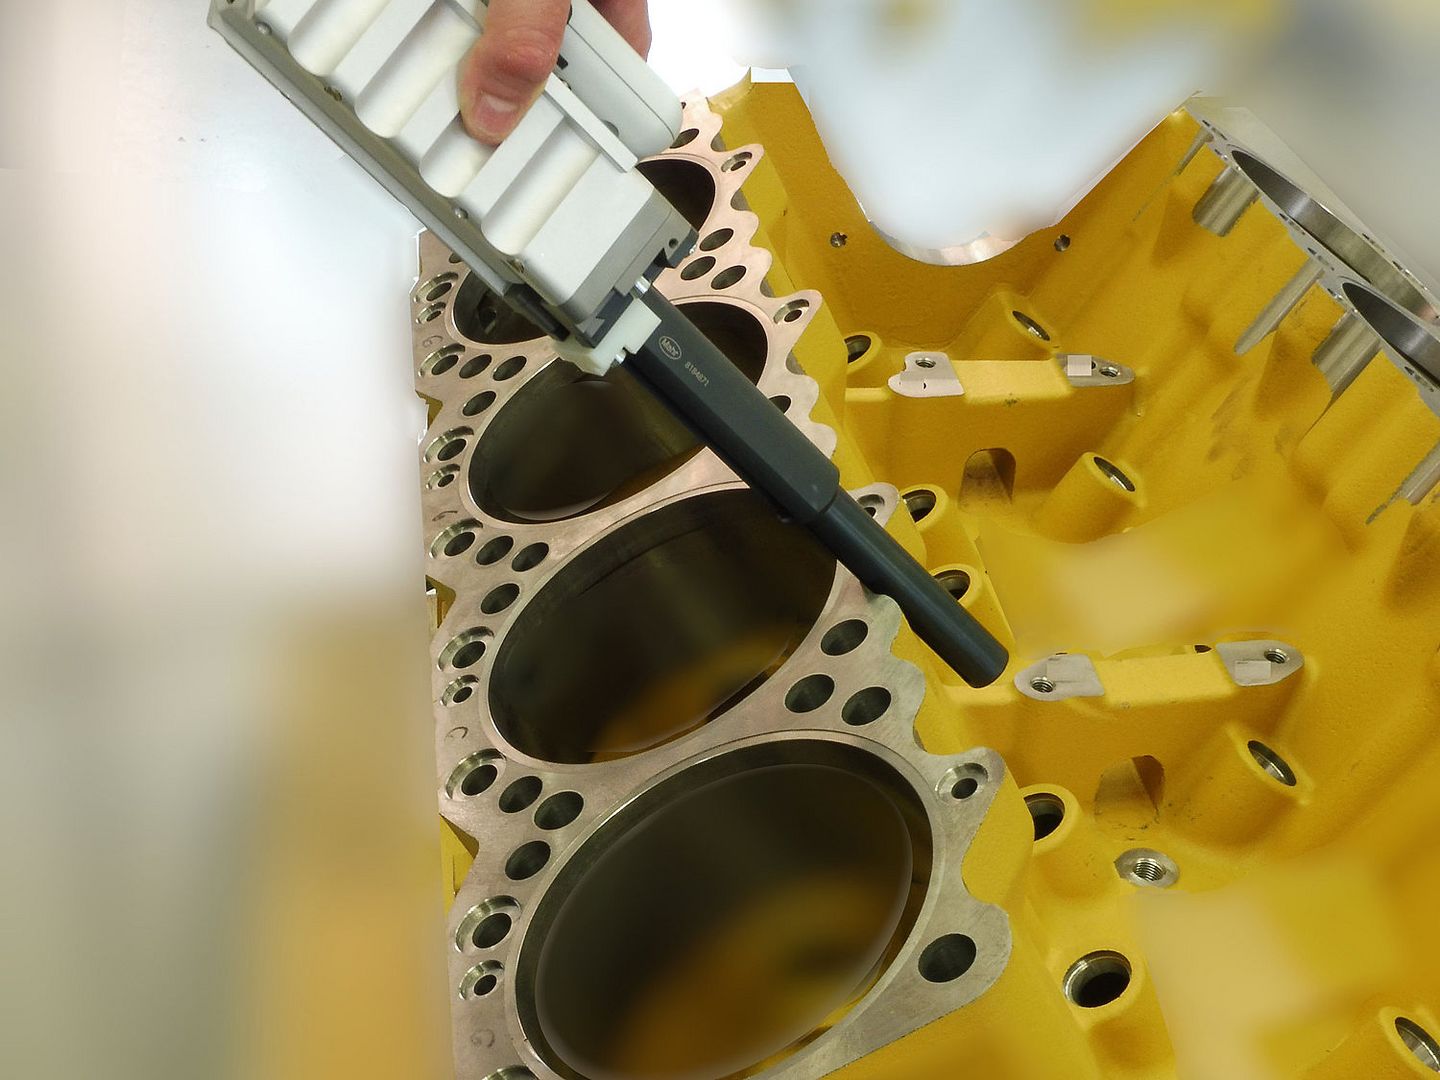
In order to carry out roughness measurements in cylinders, Mahr designs special holding fixtures for the measuring devices on request, which can be positioned exactly in depth after automatic probing. For example, the roughness gage can be guided parallel to the cylinder axis by means of cylindrical rods screwed into the threaded holes for the cylinder head. The gage is fixed at the desired height with the clamping screws. Markings on the vertical rods indicate the respective measuring position. Measurement thus takes place at the defined depth and with the roughness gage fixed.

Example 3: Roughness measurement on the flat side of the crankshaft bearing
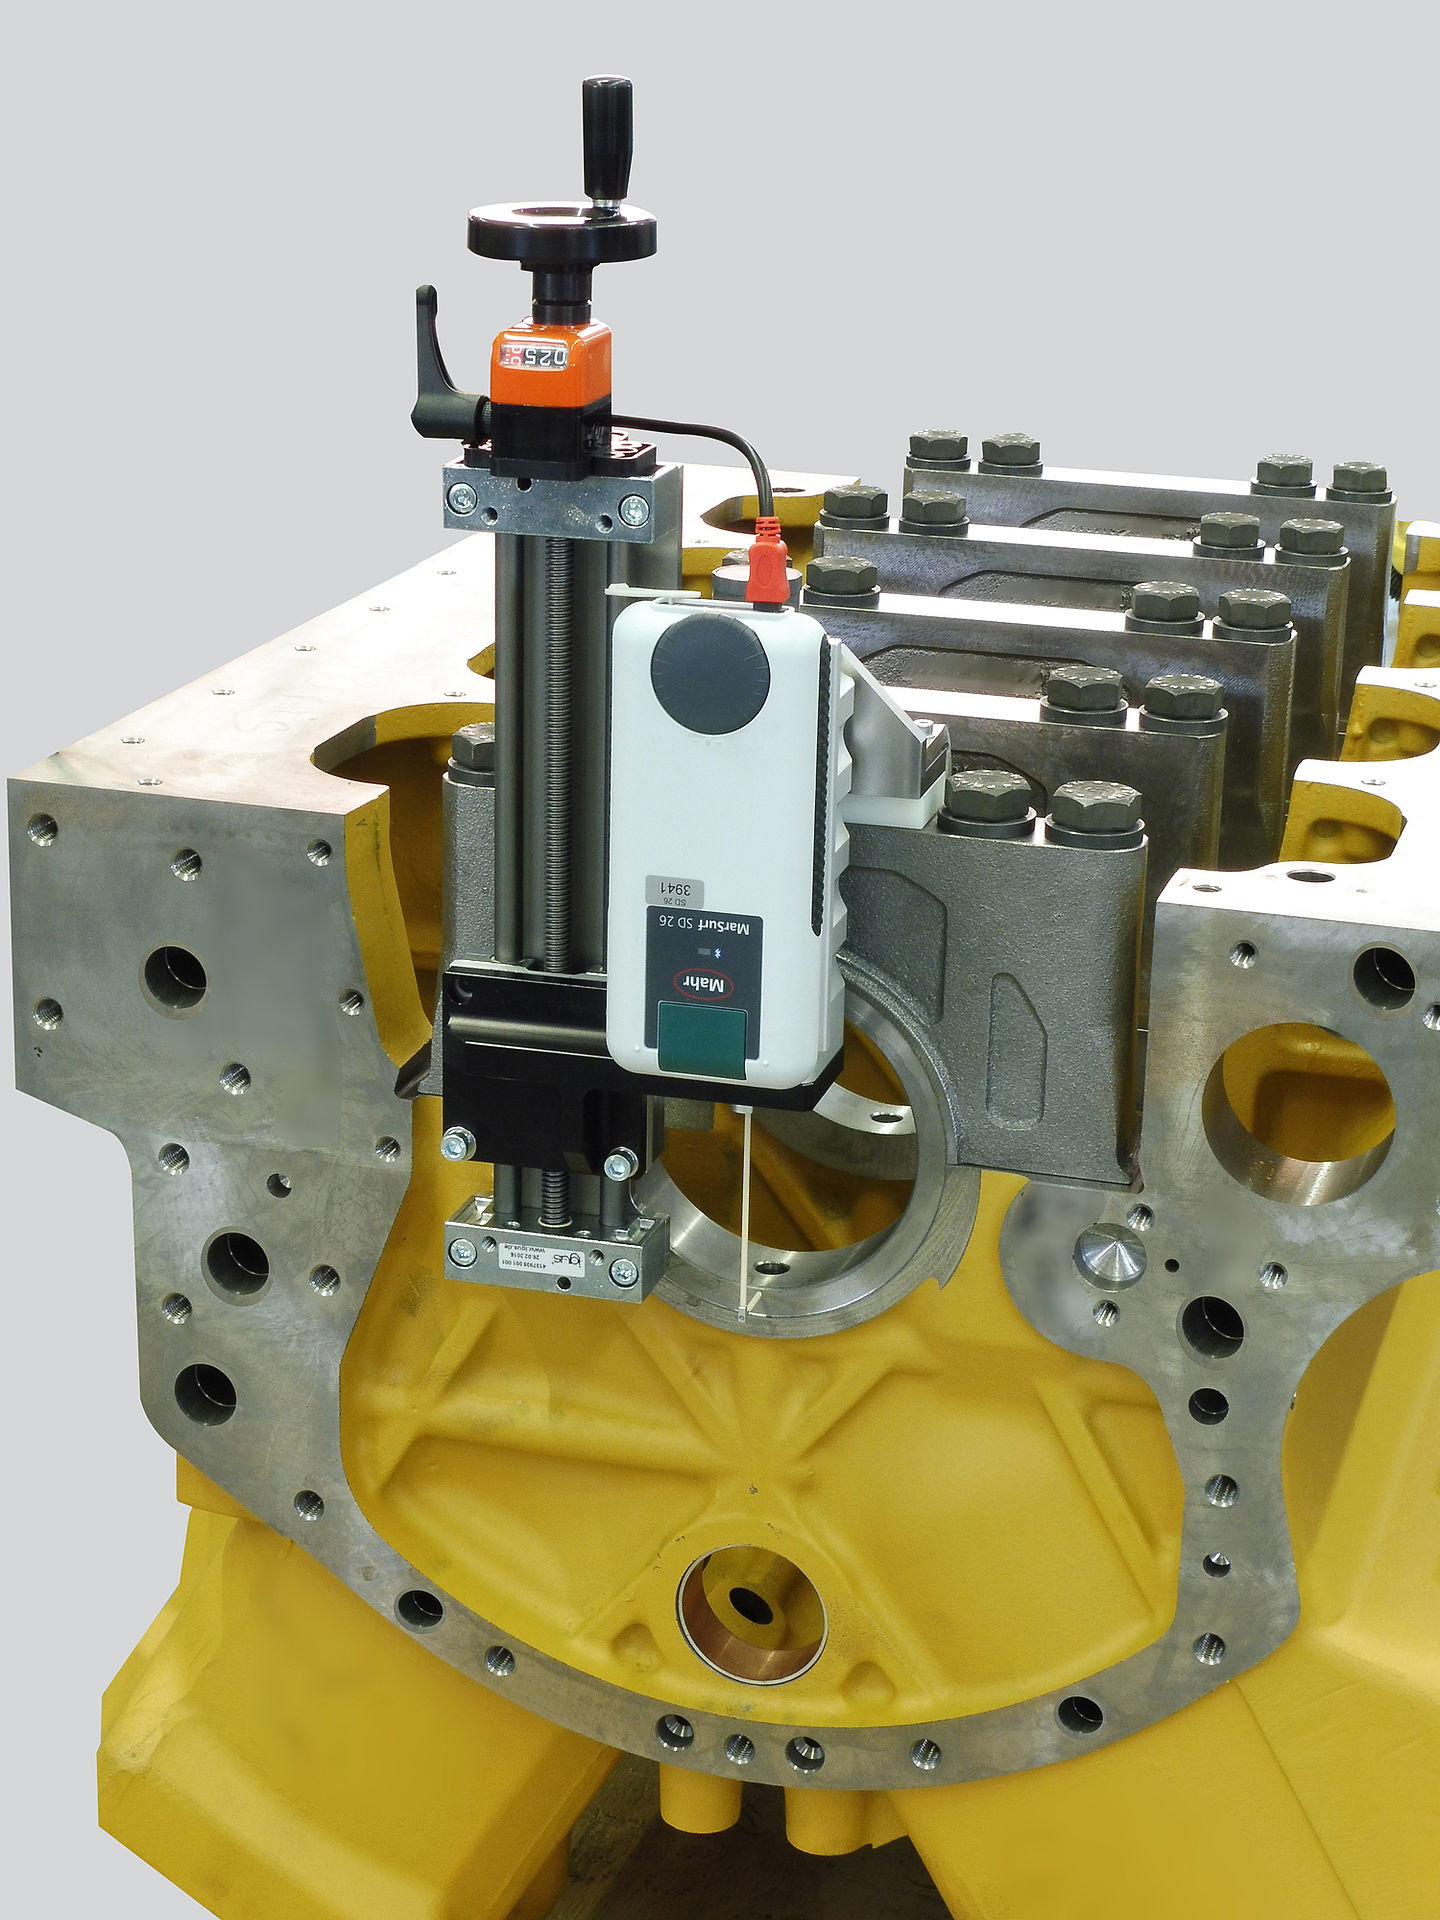
To measure the flat side of crankshaft bearings, a specially designed measuring attachment with a drive unit such as the MarSurf SD 26 is hooked into the workpiece and fixed. The hand crank ensures the correct measuring height.
[Fig. 5]

Example 4: Roughness measurement on crankshaft bearings with a handheld plug gage
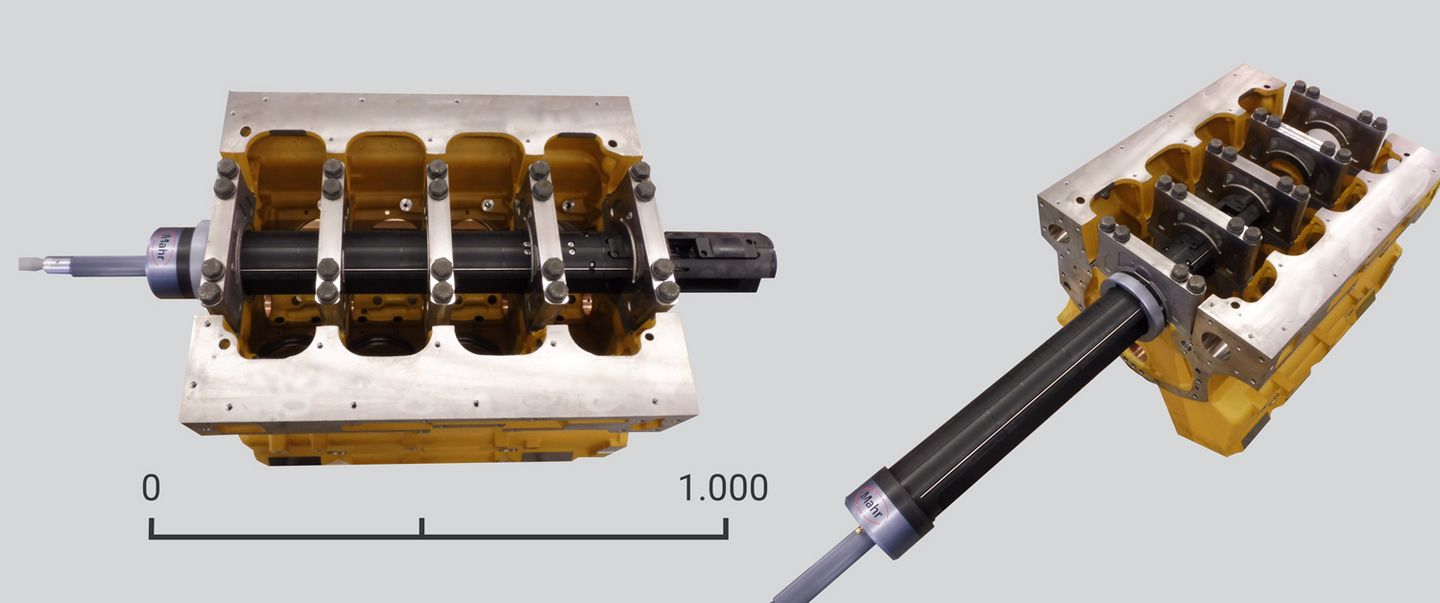
A handheld plug gage – such as the MarSurf MCR 1 – is ideally suited for measuring the roughness of individual crankshaft bearing positions. This can be positioned on the bearing to be measured by sliding the stop ring onto the corresponding marking and fixing it in place. The handheld plug gage is then positioned as far as it will go, and the pneumatic release is deactivated to center and fix the plug gage. The integrated drive unit automatically probes the bearing position and performs the measurement. In the plug gage, the probe is protected against collisions during positioning. For camshaft bearings, the handheld plug gage can be dimensioned accordingly.

Roughness measurements on large crankcases
The use of specially designed measuring mandrels and measuring attachments makes it possible to perform roughness measurements easily, quickly and reproducibly, even at very large and difficult-to-access measuring locations. When up to 16 MarSurf SD 26 drive units are connected simultaneously to a PC-based measuring station such as the MarSurf XR 1, roughness tests can be carried out in production in a practical, reliable and cost-effective manner.
Are you interested in a customized solution?
You can get more information here.


