Высококачественные измерительные решения для контроля качества на участках ОТК, на производстве, при входном контроле деталей и при опытно-конструкторских работах.
Gear Metering Pumps & Meter Mix Dispense Machines with highest accuracy for processing liquids and pastes.
High-precision rotary stroke bearings for backlash-free linear and rotational movements for use in machine and device construction.


Innovative metrology for a wide range of applications:
- • Length and diameter
- • Surface and contour
- • Form and position
- • Gears and shafts

Precise mixing and metering of liquids and pastes:
- • Gear metering pumps
- • Pumps for fiber production
- • Meter mix dispense machines as well as mixing heads

Rotary stroke bearings for backlash-free linear and rotary movements in:
- • Mechanical engineering
- • Precision engineering
- • Optik
- • Electronics
- • and many other industries


As an internationally active company, Mahr holds its patents not only in Germany, but worldwide.
Time saving thanks to efficient alignment during form testing

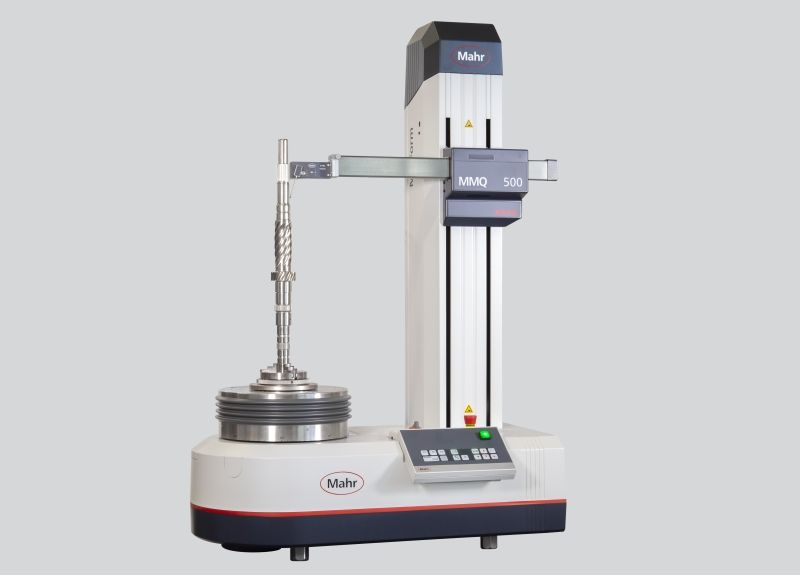
MarForm MMQ 500 measures form, position, roughness, contour and lead in just one measuring sequence - and does so both for very small components of only a few millimeters in size and for larger and heavier workpieces of up to 80 kilograms. The machine features high-precision C, Z and X axes that ensure reliable repeatability even with decreasing tolerances and difficult measuring tasks. "Two aspects were a particular focus during development: shorter measuring time thanks to automated processes and the measurability of complex, close-tolerance workpieces weighing up to 80 kilograms," explains Mahr product manager Utz Wolters.
Suitable for many industries
The MarForm MMQ 500 is ideally suited for use in mechanical engineering, medical technology, aerospace, automotive and many other industries. With it, a comprehensive workpiece evaluation according to DIN ISO 1101 is easily possible. The innovative device design supports easy use: With just one hand, workers bring all components into the correct position for their measurement.

A helpful feature is the newly developed centering and tilting table with a diameter of 300 millimeters. Compared to comparable devices, this allows workpieces to be inspected to be optimally aligned in less time, which increases efficiency and productivity in every production.
The machine can be used in the measuring room as well as directly in production. With a maximum accuracy of 0.01 micrometers, it is convincing there even with low tolerances. The mechanical bearing is up to 70 times more rigid than comparable models and is therefore insensitive to external influences, which results in high measuring reliability.
More flexible and accurate than the standard
A wide range of features can be measured with the MarForm MMQ 500: cylindricity, parallelism, roundness, concentricity, roughness, waviness and contour - depending on whether drive shafts, bearings, hydraulic pistons, commutators or gears are involved. Another feature predestines the machine for automated operation. Its probe arm unit can hold up to four probe arms, enabling automatic changeover without any operator intervention.

The measuring process itself impresses with its high speed. The Z-axis allows movements of up to 100 millimeters/second and is thus more than three times as fast as conventional form measuring devices. Thanks to its clear user interface, the integrated powerful MarWin software supports a high level of user-friendliness and reliability. "The sum of its technical innovations means that the MarForm MMQ 500 offers customers even more flexibility and accuracy than comparable machines," summarizes Wolters.
Would you like further, free advice on this product? Then please feel free to contact us at info@mahr.com or by phone at +49 (0)551/70730.
Wie können wir Ihnen helfen? Finden Sie Ihren passenden Ansprechpartner.
